Category: Appliance Care

  • Basic Maintenance Tips for Your Range Hood

    Basic Maintenance Tips for Your Range Hood

    Your range hood is susceptible to splatters and grime because it sits right above your cooktop. This leads to grease accumulation and other sticky messes especially if it doesn’t receive the maintenance it needs.

    When you establish a regular cleaning routine, your range hood becomes spotless and you don’t have to deal with this mess too often. If you need help, we have some basic maintenance tips for this appliance that will surely benefit you and your kitchen.

    Replace the carbon filter regularly

    If your hood relies on recirculation rather than extraction to refresh the air in your kitchen, then it’ll have carbon filters to deal with odors. These need to be replaces every three to six months, depending on your cooking habits. If you do a lot of frying, then they’ll need to be replaced more regularly.

    Keep exhaust ducts clean

    If your hood uses extraction to refresh the air in your kitchen, then it’ll be connected to a hole in a wall or window by an exhaust duct. Grease and other material can build up in this duct over time, so it should be cleaned at least every six months. However, this can be a little tricky, so you may want to enlist the services of a professional.

    Use mild detergents

    Avoid harsh chemicals or abrasive materials when cleaning your range hood. Use gentle dish soap or an all-purpose cleaner to wipe the exterior. Abrasive cleaners can scratch and damage the surface, leading to rust or discoloration over time.

    Clean the fan blades

    The fan blades play a key role in removing smoke and odors. Dust or grease on the blades can decrease airflow. Use a damp cloth to wipe them down and remove any buildup.

    Check the light bulbs

    Ensure your range hood’s light bulbs are working properly. A burned-out light bulb reduces visibility, especially when cooking at night. Replace any burnt bulbs promptly to maintain a well-lit cooking area.

    Get professional servicing as needed

    As a general guideline, it is recommended to have your range hood professionally serviced at least once every 1-2 years. The exact frequency at which you should professionally service a range hood depends on several factors, such as how often you cook, the type of cooking you do, and the type of range hood you have.

  • Things to Not Put in Your Dishwasher

    Things to Not Put in Your Dishwasher

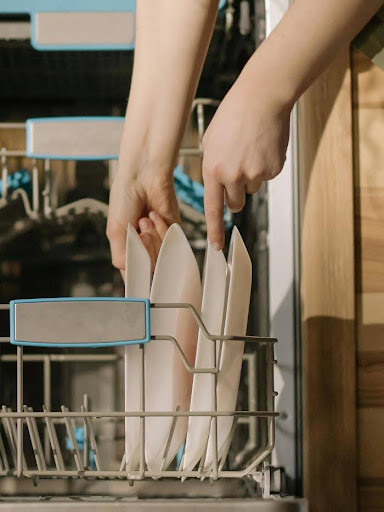
    Some people find washing dishes such a chore, which is why they would invest in a handy appliance like a dishwasher. But despite its usefulness, there are still some things that you can’t put in your dishwasher because it poses a risk of damaging it.

    To help you better understand, these are some of the things you should avoid putting in your dishwasher at all costs:

    Wood: Hot water and heat from the drying cycle can cause wood items to warp and bend out of shape. Hot water can also dull the finish of wood kitchen items. Do you have wooden utensils, bowls, or cutting boards? Be sure to hand-wash and air-dry them to maintain their beauty and function.

    Crystal: When it comes to washing crystal dishware, do it by hand! The material doesn’t play nice with dishwashers because of the intense heat during the water cycle. The hot water has the power to chip, crack, and even break fragile crystal. Take the time to lightly wash your crystal dishes and glasses by hand, otherwise you may end up only having pieces of them left. Source: Appliance World

    Insulated Mugs: Unless it’s labeled as dishwasher-safe, water can get inside the seal between the inner and outer layers of the mug, which might affect the mug’s ability to retain heat or keep drinks cold.

    Nonstick Pans: If the manufacturer doesn’t say it’s dishwasher-safe, avoid putting these in the dishwasher because it could wear away the coating, Larry says.

    Sharp Knives: Even if they’re labeled dishwasher-safe, you should wash them by hand because the knives can get dull after rubbing against other cutlery in the basket.

    Cast Iron Cookware : Cast iron skillets and pans have been around for centuries and they can last nearly forever if they are cared for properly. To keep cast iron from rusting and food from sticking, it must be seasoned with oil. The oil penetrates the iron and leaves a near perfect cooking surface.

    When the cast iron is placed in the dishwasher, the harsh detergent and excessive water strips away the oil and leaves the cast iron unusable. The seasoning process must be completely started over. This applies to cast iron pots and pans that have outer enamel coatings, as well.

    Even if your pan is covered with black crud on the outside and you think the dishwasher is an easy way to get it clean, resist the urge. Use some old-fashioned elbow grease instead.

  • How To Handle Mold in Your Fridge

    How To Handle Mold in Your Fridge

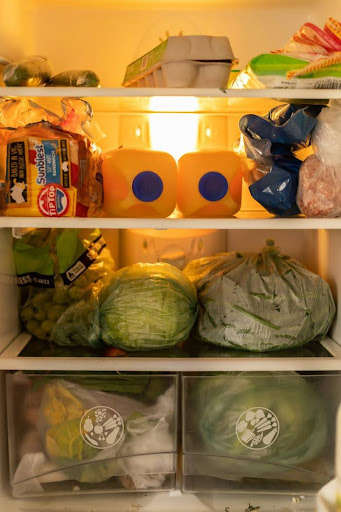
    When you find mold in your fridge, it can be a worrying sight. Not only are these things unpleasant, but they can become a potential health risk.

    In this article, we will discuss more about mold buildup in your fridge and what are the actions you need to do upon seeing these signs.

    Identifying mold growth in your refrigerator

    Before initiating the cleaning process, it’s important to recognize signs of mold growth:

    1. Foul odor: A musty or unpleasant smell inside the refrigerator can indicate mold presence.
    2. Visible mold spots: Look for black, green, or brownish spots on walls, shelves, gaskets, or around food containers.
    3. Discoloration: Any discoloration on surfaces, particularly in hidden or less-accessible areas, might indicate mold growth.

    How to get rid of mold in your fridge

    1. Take out all the shelves and drawers that are removable (for easier access) and spray them down with distilled white vinegar (do no dilute the vinegar).
    2. Let the pieces sit for a few minutes while you spray the inside of the fridge. Get every nook and cranny, as you want to be extra thorough.
    3. Scrub the surfaces with a rag, wipe again with a clean damp cloth, and then dry all the surfaces. Repeat as needed and be sure to throw away any paper towels and wash all rags that come into contact with the mold (use hot water and detergent!).
    4. Make sure to check the rubber seal around the door. If there’s mold there, you can remove it with 1 tablespoon of chlorine bleach mixed with 1 quart of water.
    5. If you want, you can add a box of baking soda or lemon wedges for extra deodorizing measures.

    How to prevent mold in the refrigerator?

    It is always best to prevent mold than to try and clean it after it appears. Here are a few ways you can prevent mold in your fridge:

    • Keep everything you bring into your fridge very dry.
    • Clean your fridge weekly to prevent bacteria from spreading due to food pieces that may have fallen around your fridge. Adding zones in your fridge can help with this.
    • Make sure you regularly defrost your fridge to prevent mold.

    We hope that you learned a lot from this article and that you will take immediate action upon seeing signs of mold in your fridge. Keep in mind that these things aren’t supposed to be there in the first place so don’t let it remain in there for too long.

  • Cleaning Your Grill Grates Before Your Next BBQ Hangout

    Cleaning Your Grill Grates Before Your Next BBQ Hangout

    Is this your first time owning a BBQ grill and you’re wondering how you can clean it? There’s a good chance that you just had a BBQ full of grease and grime, and the thought of cleaning it right away may have slipped your mind.

    Throwing the ashes away is the easy part and cleaning the grill is the actual challenge. Seeing the grilled-on grub on the grate is a nightmare to get rid of and could be the reason why the cleaning process gets postponed too many times.

    So, if you want your BBQ grill to be ready for the next cookout, then we have a few pointers to share with you that can be very helpful.

    Why Cleaning Grill Grates Regularly is Important?

    • Improved food flavor: Cleaning grill grates helps remove residue, grease, and food particles that can accumulate over time. This buildup can affect the taste and quality of the food being prepared. Regular cleaning ensures that the flavors of different dishes remain distinct and appetizing.
    • Enhanced food safety: Dirty grill grates can harbor harmful bacteria and pathogens, posing a serious health risk to customers. Regular cleaning cast iron grill grates helps eliminate these potential contaminants, reducing the chances of foodborne illnesses and ensuring the safety of the patrons.
    • Prevents cross-contamination: Cleaning grill grates between cooking sessions prevents cross-contamination of flavors. Residual flavors from previous meals can transfer to new dishes, altering their taste and potentially causing customer dissatisfaction.

    Directions on How to Clean Your Grill Grates

    1. Mix 2 cups of vinegar and 1 cup of baking soda in a garbage bag.
    2. Seal the grates in the garbage bag with a rubber band.
    3. Soak the grates overnight.
    4. Remove the grates and rinse them off with water. The food that was originally stuck on the grates should fall off, but if there’s anything still stuck on you should be able to easily scrub off the rest.
    5. Rinse with cool water and pat dry.

    What Are Some Everyday Hacks for Keeping Grill Grates Clean?

    • Use an onion: Chefs and grill masters recommend cutting an onion in half and rubbing it over the grates while they’re still hot. The juices from the onion will help to loosen any food particles, making them easier to remove. (Hold the onion securely with tongs or a grilling fork)
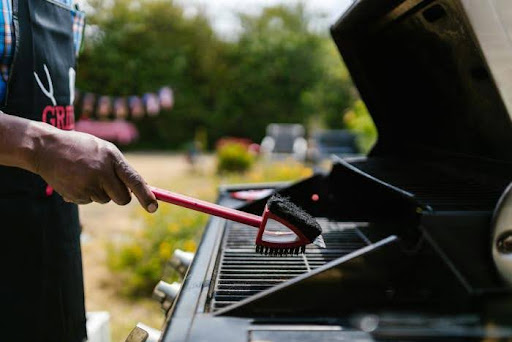
    • Brush the grates: Use a nylon brush to scrape off any food particles or debris that are stuck to the grates. This should also be done while the grates are still hot, as it will be easier to remove any residue before it hardens.
    • Cover your grill: Sheltering your grill with a cover that fits snugly will help protect it from the elements and avoid any buildup of rust.
  • Tips For General Appliance Maintenance

    Tips For General Appliance Maintenance

    Our lives at home are made easier with the use of daily appliances. It’s important that they also need some care and maintenance to ensure they’re running functionally and efficiently.

    If you want more years for your general home appliance, then you need to follow through with their maintenance on a regular basis. Check out this guide:

    Key Benefits of Regular Appliance Maintenance:

    • Extends lifespan – Proper care keeps appliances running smoothly for years.
    • Improves energy efficiency – Clean and well-maintained appliances use less energy.
    • Reduces repair costs – Preventative maintenance catches small issues before they become big problems.
    • Enhances safety – Avoids potential hazards such as leaks, electrical failures, or fire risks.
    • Maintains performance – Ensures your appliances operate at their best so that you experience optimal results.

    General Maintenance Tips

    1. Keep appliances clean from dust, grime, and food debris to maintain efficiency and appearance.
    2. Inspect hoses, connections, and seals for leaks to prevent water damage and potential mold growth.
    3. Check power cords for signs of wear or fraying, and replace damaged cords immediately to avoid electrical hazards.
    4. Clean or replace filters as the manufacturer recommends to improve performance and air quality.
    5. Ensure refrigerators, ovens, and freezers maintain accurate temperature settings for optimal performance and food safety.
    6. Apply appropriate lubricants to moving parts of appliances, such as door hinges, to reduce friction and extend their lifespan.
    7. Inspect and clean door seals and gaskets on refrigerators, ovens, and dishwashers to maintain proper sealing and energy efficiency.
    8. Check safety features like auto-shutoff and gas leak detectors to ensure they function correctly.
    9. Ensure appliances are level to prevent vibrations, noise, and potential damage.
    10. Remove lint and debris from dryer vents regularly to prevent fire hazards and improve drying efficiency.

    Troubleshooting Common Issues

    Even with regular maintenance, issues can arise. Here are some common problems and simple troubleshooting tips:

    • Appliance Won’t Start: Check if the appliance is properly plugged in and if the circuit breaker has tripped. For major issues, you might need to call a professional.
    • Unusual Noises: Strange noises can indicate loose parts or internal damage. If tightening screws doesn’t resolve the issue, it may be time for a professional inspection.
    • Leaking: A leak often points to a problem with seals or hoses. Inspect these components and replace any damaged parts as needed.
  • Most Common Gas Stove Problems

    Most Common Gas Stove Problems

    A gas stove is one of the most used appliances in the household and there’s no doubt that it will
    need some repairs sooner or later. In fact, when a gas stove needs to be repaired, a
    professional is needed for the job most of the time.

    The good news about this kind of repair is that they can be easily fixed as long as you’re able to
    identify the problem. So, if your gas stove is showing any of these problems, you should contact
    repair services right away:

    There’s a Faulty or Wet Igniter

    If a burner on your gas stove is taking a little longer than usual to light, or the flame coming from
    the burner is more orange than blue, it could be the result of a wet or dirty igniter or burner. If
    you recently cleaned your stovetop, you may have gotten the igniter wet, which will prevent the
    gas from lighting instantly when you turn on the burner.

    The Burner Is Clogged by Food Debris

    The flame on your gas stove should always burn blue, but a weak flame may appear yellow or
    orange. A yellow or orange flame indicates incomplete combustion, which can release carbon
    monoxide into your home. This happens when a burner is partially clogged, causing the level of
    the gas flowing into the burners to be reduced.

    If you haven’t cleaned your stovetop in a while, grease and other cooking residue can build up
    and clog the burner and reduce the flow of gas. This can prevent the burner from producing a
    blue flame as soon as you turn it on.

    A Weak Burner Flame

    Over time, your burner flame openings could be clogged with debris which could cause a weak
    or lacking flame. A weaker burner flame could also be the result of too little gas or too little air

    getting to the burner. We suggest you take out the burner caps and soak them in the sink with
    some soap and hot water and use a toothpick to remove food or other debris from the gas
    valves. Adjust the air shutter if you think the issue is with the amount of air but call a
    professional offering gas stove services if you suspect the problem is inadequate gas
    flow.

    Unnecessary Clicking of Igniter

    When the burner is turned on, the igniter clicks to give a flame to the gas flow. But if the clicking
    sound continues even after the burner flame, then this is because of some problem.
    A common reason behind the unnecessary clicking of the igniter is the burner blockage or the
    loose burner cap.

    Noisy Burners

    The flames on the burners can become noisy because of the excessive air or gas flow through
    the valves. This can be risky because too much gas can result in fire. Moreover, the gas gets
    wasted.

  • Problems That Every Oven Experiences

    Problems That Every Oven Experiences

    A broken oven can be problematic, especially if you have a family to feed. The good news is that most of these issues are a quick fix, and you don’t have to rely on dine-ins or take-outs just to eat food.

    You must know what these common oven problems are so that you’ll understand whether you can fix the problem yourself or call up a professional to handle it.

    The oven does not heat

    If the oven isn’t heating, the most common reason is a damaged igniter that must be replaced. Locate the manufacturer’s manual and follow the instructions to replace the igniter on the oven. Remember to turn the oven power off completely before doing any work to avoid accidents.

    The oven light doesn’t turn on

    When the oven light doesn’t turn on, the usual culprit is a burned-out bulb. Use the manufacturer’s manual and follow the instructions to replace the bulb. If this doesn’t solve the issue, the problem could be more than an electrical issue, and professional help is likely necessary.

    Oven door won’t open or shut

    If the door doesn’t open after a self-cleaning cycle, start by unplugging the unit or shutting off the circuit breaker for five minutes. Once you restore power, gently move the door lock lever and see if you can now open the door. If this doesn’t work, reset the self-clean cycle, allow it to work for 15 minutes, and then cancel the cycle. After letting the oven cool for a little while, move the door lock lever and try opening the door again.

    If the oven door doesn’t stay shut, you may need to replace the hinge. This requires disassembling the door and possibly removing the side panel as well. If you need help, call an appliance repair technician for assistance.

    Oven won’t self-clean

    Several common oven issues can prevent an oven from self-cleaning. First, make sure the door switch is locking the oven properly since the self-cleaning cycle won’t begin unless the door is locked.

    If that’s not the issue, there could be a problem with the temperature control thermostat, wiring, oven control board, or thermal fuse. Testing and repairing these components requires special skills and tools, so leave the job to an appliance repair specialist.

    Oven won’t cook food evenly

    Often, an oven that appears to cook unevenly is actually the cook’s error. The placement of food in the oven has a significant effect on cooking. Consider experimenting with the placement of your oven’s racks. You may find the top zone of the oven is hotter than the bottom, or vice versa.

    Also pay attention to the placement and shape of your oven’s heating elements. You may need to push food a little farther back in the oven to have it fully beneath your oven’s broiler, for instance.

    If positioning isn’t the cause of your cooking troubles, check your oven’s temperature sensor or consider recalibrating your oven.

  • Cleaning Your Coffee Maker

    Cleaning Your Coffee Maker

    Having a coffee maker that has been working for many years means that it will require regular maintenance and care. This is a way to ensure its performance and longevity, especially if you want your coffee to continue to taste good.

    To help you with this process, we have listed some ways on how you can clean your coffee maker at home using easy methods.

    Descaling your coffee maker is important

    The water you run through your coffee maker daily can leave behind small deposits of limescale. As time goes by, these limescale deposits will grow and can cause problems. This is why descaling your coffee machine is so important. Modern coffee makers have a descaling cycle that makes removing limescale much easier. By descaling your coffee maker regularly, you can make it last longer and perform better.

    Rinse all removable components in warm and soapy water

    One simple yet essential practice is to thoroughly rinse all removable components in warm, soapy water.

    • Utilising warm water, combined with a mild detergent, helps to effectively break down grease, grime, and any germs that may have accumulated over time.
    • By diligently washing these removable parts, you not only safeguard the functionality and longevity of your appliances, but you also contribute to a more hygienic and enjoyable cooking experience.

    Don’t underestimate the power of warm, soapy water in keeping your kitchen spick and span!

    Run a solution of white vinegar through when cleaning a coffee maker.

    Unless you are consistently using bottled purified or spring water, your coffee machine will get a buildup from hard minerals. Mix equal parts white vinegar and water and put the solution in the water reservoir. Run half through, then turn off the coffee maker and let the solution sit for at least 30 minutes before brewing the rest through.

    For example, if you make 8 cups of vinegar and water solution, run four cups through, let the machine rest, and then run the other four cups through. This is a great way to clean out the inner parts of the coffee machine with very little effort. When the solution is done brewing, you can dump it out and move on to a thorough cleaning of your coffee pot.

    After the vinegar solution, thoroughly clean your coffee pot.

    Like the filter, this cleaning is more than just a simple rinse. The vinegar solution is a good starting point, but if you want to give your coffee pot a little extra TLC, add warm water and a little bit of uncooked rice to the empty pot and give it a swirl! This loosens up any debris, and a final swipe of a sponge will get your coffee pot sparkling.

  • Things You Should Never Put in Your Oven

    Things You Should Never Put in Your Oven

    The phrase “you learn something new every day” is applicable to everyone – even seasoned home cooks. This is because cooks aren’t exempt from learning a thing or two in the kitchen. There are certainly some things that some people don’t know about, especially around what NOT to put in the oven.

    If you’re ever doubtful about including something in the oven other than food, then here’s some information to help clear your mind.

    Wax Paper

    Given its association with baking, you might be surprised to learn that wax paper is not an oven-safe material. The heat of your oven can melt the wax coating from the paper, leaving it prone to catching fire. Accordingly, you should never line your baking sheets or cake pans with wax paper; save it for food packaging purposes instead.

    Other Paper Products

    As a general rule, paper does not belong in the oven. This is because (as most are likely aware), paper is incredibly flammable. If a paper product comes into contact with the oven’s heating elements, it will combust; and even if the paper does not directly touch a heating element, the high temperature alone can set it aflame.

    Plastic Containers or Utensils

    Plastic melts quickly at high temperatures, creating a sticky, toxic mess in your oven and releasing harmful fumes. Even plastic items labeled as “heat-resistant” have limits and shouldn’t be exposed to oven-level heat.

    Non-Oven-Safe Glassware

    Not all glassware is oven-friendly. Ordinary glass dishes and mixing bowls can shatter when exposed to sudden temperature changes or prolonged heat, creating a hazardous mess. Only use glassware that is clearly marked as “oven-safe.”

    Frozen Foods That Need Thawing

    Frozen thick cuts of protein, like chicken or steak, need to be thawed before they are placed in the oven. If they aren’t properly thawed beforehand, you risk uneven cooking and possibly even leaving a frozen center. Spending hours working on your highly seasoned steak only to have it ruined by an uneven middle is something that can easily be avoided.

    You can thaw in multiple, different ways. It’s important to keep your meat below a certain temperature zone because if left out for longer periods, you risk harmful bacterial growth. The best way is to leave the frozen meat in the fridge, but that can take a couple of days. For a faster thaw, submerge an air-tight package under cold water, replacing the water frequently. You can place something heavy on top to keep it submerged.

  • Is Your Freezer Not Freezing Properly? This Could Be the Problem

    Is Your Freezer Not Freezing Properly? This Could Be the Problem

    Freezer issues are very common no matter what generation of refrigerator you’ve bought. These issues make themselves known when the ice cubes aren’t freezing properly, there’s ice and frost build up, or it makes too much noise that you can barely hear the sound coming from another room. Once this happens, your refrigerator is due for repair/maintenance to ensure it continues to work and won’t spoil the foods you’ve stored in there.

    For starters, here are the common reasons why your freezers may not be working properly.

    Overpacking

    If your freezer is not working, the first thing to check is if the shelves are packed too tightly. Overstuffed freezers can cause an airflow blockage, especially when the evaporator fan is blocked. If your freezer is not cold enough, try clearing off your freezer shelves. By clearing and reorganizing food and getting rid of items possibly forgotten in the back of the freezer, you can make sure the evaporator fan has proper airflow.

    Frost Buildup

    Excess frost buildup on the walls of your freezer can congest the vents and coils that keep your freezer functioning. If it’s not working, you can defrost your freezer to melt buildup to help your freezer maintain its proper temperature. Keep in mind that most modern freezers have auto defrost, so if you have frost buildup, it may indicate a bigger issue. You might need to consult a service professional for further evaluation.

    Dirty Condenser Coils

    Dirty coils won’t cool down refrigerant before it enters the evaporator, resulting in poor cooling performance. Clean the condenser coils if they’re caked with lint and dust. You may need to have a service technician clean the condenser coils if they’re not easily accessible.

    Broken Evaporator Fan Motor

    A failed evaporator fan can cause freezer cooling problems because it won’t circulate air through the freezer cabinet. You’ll need to have a service technician replace the evaporator fan if it doesn’t run when activated.

    Bad Start Relay

    Finally, a freezer that isn’t freezing might mean that your start relay is not working as it should, meaning that it isn’t giving power to your compressor. You can conduct a physical test on your start relay by unplugging your refrigerator, opening up the compartment at the back of your freezer, unplugging the start relay from the compressor, and then shaking the start relay. If you hear a rattling noise that sounds like dice in a can, your start relay will have to be replaced. If it does not rattle, that might mean that you have a compressor issue, which will require professional repair assistance.