Author: Francine Oliver

  • Vacuum Cleaners Explored – 10 Genius Cleaning Hacks You Didn’t Know Your Vacuum Cleaner Could Do!

    Vacuum Cleaners Explored – 10 Genius Cleaning Hacks You Didn’t Know Your Vacuum Cleaner Could Do!

    Vacuum cleaners have come a long way from the days of bulky machines that left you dragging cords and dealing with limited cleaning power. As an expert in home appliances and a passionate advocate for making cleaning as easy as possible, I’ve seen firsthand how modern vacuum cleaners, especially those from top brands like Bosch, Miele, and Sebo, can transform your cleaning routine.

    1.Perfect Your Pet Hair Removal

    If you’ve got pets at home, you’ll know pet hair can be an ongoing battle. But did you know that your vacuum cleaner can be the best weapon in this fight? Models like the Miele C3CAT&DOG Vacuum Cleaner come equipped with specialised pet tools that easily lift hair from both carpets and upholstery. I’ve personally used this vacuum to tackle the hair from our Hungarian Vizsla, Maggie (Office Dog) and found that the turbo brush makes it effortless to pick up pet hair, even in hard-to-reach places.

    2.Use Your Vacuum to Clean Your Mattress

    Vacuum cleaners are fantastic for more than just floors. Using the upholstery tool on your Bosch BGS05BA2GB Bagless Cylinder Vacuum Cleaner makes it simple to clean your mattress. The gentle suction can remove dust mites, allergens, and dead skin cells. Regular vacuuming of your mattress ensures a cleaner, healthier sleep environment — a game changer for anyone who suffers from allergies.

    3.Freshen Up Your Curtains

    You don’t need to take down your curtains to clean them. Instead, use the upholstery brush on your vacuum to gently remove dust and dirt from fabric without disturbing the hang of the curtains. I’ve tried this with my Miele Compact Cylinder Vacuum Cleaner, and it saved me a lot of hassle. Plus, it helps extend the lifespan of your curtains by removing particles that can wear them down.

    4.Quickly Clean Your Car Interior

    The best way to keep your car interior looking pristine is with a portable vacuum. The Bosch 296 Stick Vacuum Cleaner, available at Ruislip Appliances, is perfect for the job. It’s cordless, lightweight, and powerful enough to get into every corner of your car. Use the crevice tool to reach tight spaces between seats and in the glove compartment.

    5.Vacuum Clean Your Ceiling and Walls

    Don’t forget the high places! The extension hose and various tools on models like the Sebo Airbelt K1 Pro ePower make ceiling and wall cleaning much easier. You can clear away cobwebs, dust, and debris without getting on a ladder. It’s a quick way to keep every corner of your home fresh.

    6.Clean Your Refrigerator Coils

    Refrigerator coils often collect dust, which can reduce your fridge’s efficiency. Many modern vacuums, including the Bosch BCS612GB Stick Vacuum, come with special attachments that make it easy to clean these hard-to-reach areas. I personally use a brush attachment, and it has helped maintain the optimal performance of my appliances.

    7.Refresh Your Carpets with Baking Soda

    For a deep clean, sprinkle some baking soda on your carpet before vacuuming. Not only does it neutralise odours, but when used with a powerful vacuum like the Miele Classic Cylinder Vacuum Cleaner, it lifts dirt and debris more effectively. The extra suction really helps to bring the carpet back to life!

    8.Use Your Vacuum for a Spotless Grout

    Cleaning grout with a regular mop can be tedious, but your vacuum cleaner can make this job easier. Use a vacuum with a soft brush attachment, like the Miele Boost CX1, to gently lift dirt and grime from the grout lines between tiles. It’s an easy way to refresh your kitchen or bathroom floor.

    9.Clean Behind Large Appliances

    We all know the challenge of cleaning behind large appliances like fridges or washing machines. With the long hose on vacuums like the Bosch AirCycle Tech Cylinder Vacuum, you can easily reach under and behind these items without needing to move them. It’s an easy way to get rid of that hidden dust and debris.

    10.Sanitise Your Floors with Steam

    Some advanced vacuums, such as the Sebo Automatic X7 Pro , are designed to be used with additional steam cleaning functions. You can sanitise your floors and get rid of bacteria with ease, making it an essential tool for households looking for a hygienic clean without harsh chemicals.

    In conclusion, vacuum cleaners, particularly models like those from Bosch, Miele, and Sebo, are incredibly versatile tools that go far beyond basic floor cleaning. With the right attachments and a little creativity, you can clean your entire home — from mattresses to refrigerators and even your car. Visit Ruislip Appliances to explore a wide range of vacuum cleaners that can make your cleaning tasks faster, easier, and more effective. Whether you’re dealing with pet hair, dust mites, or just general cleaning, there’s a vacuum that fits your needs perfectly.

  • How to Choose the Right Tumble Dryer: A Complete Guide

    How to Choose the Right Tumble Dryer: A Complete Guide

    A tumble dryer is an essential appliance for many households, especially in colder or wetter climates (like the lovely weather we have recently been experiencing in Ruislip) where outdoor drying isn’t always feasible. However, with various models, features, and energy ratings on the market, choosing the right one can be a bit overwhelming. Of course, you are always welcome to give us a call or pop into the Ruislip showroom, but in the meantime, this guide will help you navigate the key factors to consider when buying a tumble dryer, so you can find the perfect match for your home and laundry needs.

    1.Types of Tumble Dryers

    There are three main types of tumble dryers, each with its own advantages and drawbacks. Let’s break them down:

    A. Vented Dryers

    Vented dryers work by expelling hot, moist air outside through a hose. This type requires a nearby external vent or window, making installation a bit more involved.

    • Pros: Generally more affordable, faster drying.
    • Cons: Needs ventilation setup, less energy-efficient.

    B. Condenser Dryers

    Condenser dryers collect moisture from your laundry into a reservoir or tank, which you need to empty regularly (or some models auto-drain).

    • Pros: Easier installation, no need for external venting.
    • Cons: Can be less energy-efficient, slightly more maintenance with the water reservoir.

    C. Heat Pump Dryers

    These dryers recycle hot air within the drum, making them much more energy-efficient than the other types. They tend to be more expensive but pay off in the long run through lower energy bills.

    Pros: Extremely energy-efficient, gentle on clothes.
    Cons: Higher upfront cost, slower drying times.

    2.Energy Efficiency

    Energy efficiency is one of the most crucial factors to consider when purchasing a tumble dryer. Modern models come with energy ratings ranging from A+++ (most efficient) to D (least efficient). Heat pump dryers are typically rated the highest due to their energy-saving technology.

    If you’re concerned about your environmental impact or want to reduce your energy bills, opt for an A-rated or higher dryer. Keep in mind that heat pump dryers, though expensive upfront, can save you significantly on running costs over time. Our website highlights the energy rating of each appliance, this is also displayed in store to help you make a considered purchase!

    3.Capacity

    The capacity of a tumble dryer is measured in kilograms and reflects the weight of dry laundry it can handle in one go. Here’s a quick guide to choosing the right capacity based on your household size:

    • Small households (1-2 people): 4-6 kg capacity
    • Medium households (3-4 people): 7-9 kg capacity
    • Large households (5+ people): 9-10+ kg capacity

    It’s important to match the capacity to your needs. A too-small dryer may result in more frequent loads, while an overly large one may waste energy.

    4.Drying Programs and Features

    Modern tumble dryers come with a variety of programs designed for different fabrics and drying needs. Here are a few features to look for:

    • Sensor drying: Automatically detects when your clothes are dry and stops the cycle to avoid over-drying, saving energy and protecting your fabrics.
    • Quick-dry: Ideal for small loads or when you’re in a hurry.
    • Delicate cycle: For more sensitive fabrics like silk or wool.
    • Anti-crease option: Gently tumbles clothes after the cycle to reduce creasing.
    • Child lock: If you have young children, this safety feature prevents accidental changes to settings or starting the dryer.

    5.Noise Level

    If your dryer is going to be placed in a living space or near bedrooms, noise might be a consideration. Dryer noise levels are measured in decibels (dB). Quieter models tend to operate at around 65 dB or lower. For comparison, 60-70 dB is about the sound of a normal conversation, while anything above 80 dB can be disruptive.

    6.Price

    Tumble dryers come in a wide range of prices, from budget-friendly models around £200 to high-end, feature-rich ones costing over £1,000. Your budget will largely determine which type of dryer you can afford, but also consider how long-term savings (especially on energy bills) might offset the initial investment in a more expensive model.

    Budget-Friendly Models

    • Basic vented or condenser dryers
    • Fewer programs and features
    • Shorter lifespan, generally less energy-efficient

    Mid-Range Models

    • Condenser or heat pump dryers
    • More advanced features like sensor drying
    • Higher energy efficiency

    High-End Models

    • Heat pump dryers with top-tier energy ratings
    • Smart technology integration, Wi-Fi control, and advanced fabric care options
    • Longer lifespan, quiet operation, and premium features

    7.Smart Features

    Some high-end tumble dryers now come with smart features that allow you to control and monitor your dryer via smartphone apps. You can start a cycle remotely, receive notifications when it’s done, and even diagnose issues through the app. While these features can add convenience, they may not be necessary for everyone.

    8.Installation Considerations

    If you’re buying a vented dryer, remember that it needs to be placed near an external vent or window. Condenser and heat pump dryers, on the other hand, can be placed almost anywhere in the home, but ensure you have enough space for ventilation around the appliance. We can discuss installation options with you, and our skilled delivery team can carry out the installation for you!

    9.Brand and Reliability

    Consider the reputation of the brand you’re buying. Trusted brands may offer better build quality, reliable customer service, and longer warranties. Always check reviews and ask for recommendations from friends or family who own the model you’re considering.

    Final Thoughts: What’s the Right Tumble Dryer for You?

    The right tumble dryer for your home depends on your budget, energy efficiency preferences, and the size of your household. A heat pump dryer is ideal for energy-conscious buyers, while a vented dryer could be a great fit for those looking for a budget option and don’t mind the installation. Always compare features, check energy ratings, and consider long-term savings before making a final decision.

  • Mastering the Art of Fridge Cleaning and Organisation

    Mastering the Art of Fridge Cleaning and Organisation

    Transform Your Fridge: A Guide to Cleaning and Organising

    Your fridge is more than just an appliance—it’s the heart of your kitchen. Keeping it clean and organised isn’t just about aesthetics; it’s essential for food safety, reducing waste, and streamlining meal prep. Follow this step-by-step guide to turn your fridge into a well-maintained, functional space.

    Step 1: Prepare Your Space

    Before starting, ensure you’re fully prepared.

    1. Empty the Fridge: Remove all items, placing perishable foods in a cooler to keep them fresh.
    2. Declutter: Toss expired items, stale leftovers, and anything you know you won’t use. This clears space and prevents clutter from reappearing.

    Step 2: Deep Clean the Interior

    With the fridge empty, it’s time for a thorough clean.

    • Remove and Soak: Take out shelves, drawers, and other removable parts. Soak them in warm, soapy water, scrub gently, and let them air dry.
    • Wipe Down Surfaces: Mix baking soda with warm water and use this solution to clean the fridge interior. Pay close attention to corners, seams, and door seals where grime accumulates.
    • Clean the Door and Gaskets: Don’t forget the inside of the door and its seals—they often harbor crumbs and spills.

    Step 3: Organise by Zones

    Once your fridge is clean, focus on organisation. Divide your fridge into zones based on temperature and food type:

    • Top Shelves: Store ready-to-eat foods like leftovers, drinks, and snacks. This area is slightly warmer than the rest.
    • Middle Shelves: Perfect for dairy, eggs, and deli items, which need a consistent temperature.
    • Bottom Shelves: The coldest part of the fridge is ideal for storing raw meat, poultry, and fish. Use leak-proof containers to avoid cross-contamination.
    • Crisper Drawers: Use these for fresh produce.
      • High-humidity drawer: Leafy greens and vegetables.
      • Low-humidity drawer: Fruits.
    • Door Shelves: Store condiments, sauces, and similar items here. Avoid keeping milk or eggs in the door, as it’s the warmest part of the fridge.

    Step 4: Use Clear Containers

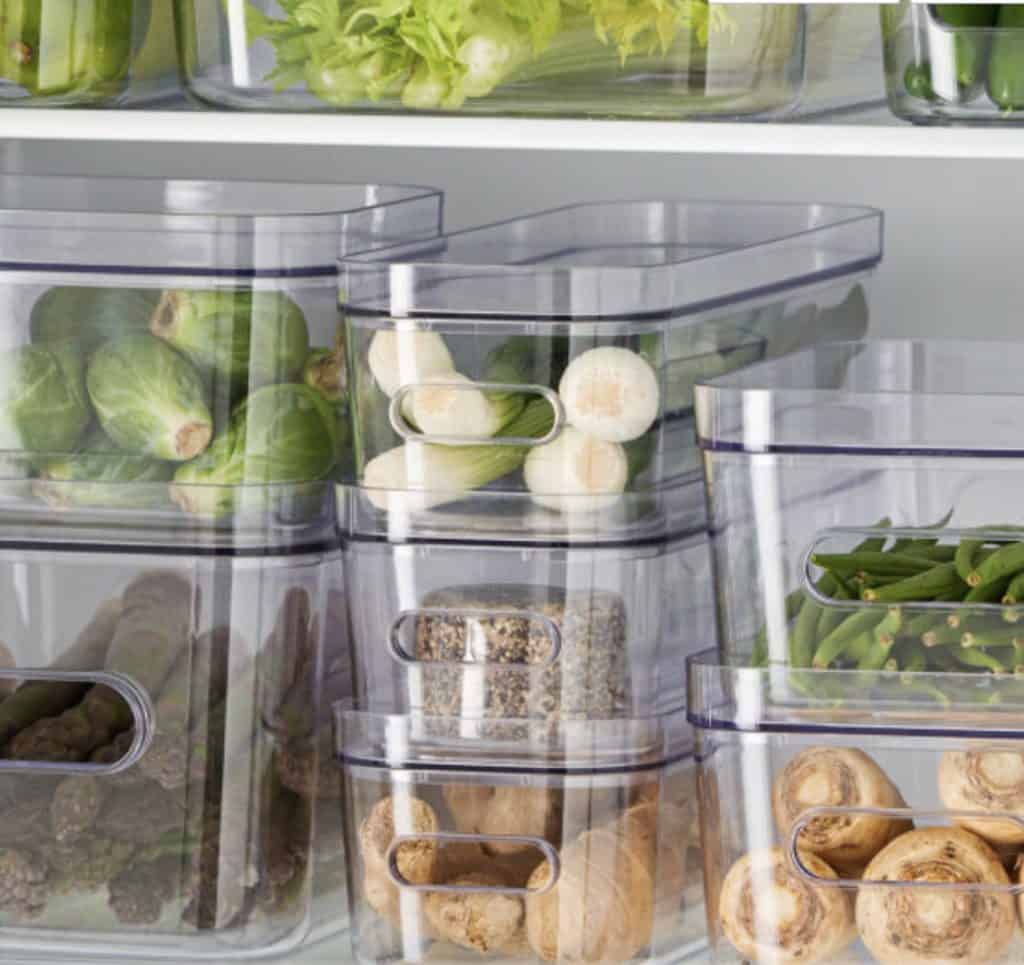
    Invest in clear, stackable containers for leftovers and prepped food. These:

    • Maximise space.
    • Allow you to see contents at a glance, reducing food waste.
    • Help track freshness—label containers with dates to keep things organised.

    Step 5: Practice Regular Maintenance

    Keep your fridge in top shape with consistent upkeep:

    • Weekly Wipe-Down: Clean shelves and remove old food before your grocery trip.
    • Check Expiry Dates: Rotate items so older ones are used first.

    Step 6: Avoid Overcrowding

    An overstuffed fridge hinders air circulation, leading to uneven cooling and making it harder to find items. Aim to keep your fridge about 75% full to maintain efficiency and ensure proper cooling.

    Step 7: Address Odours Promptly

    If odours arise:

    • Use an open box of baking soda to neutralise smells.
    • Try natural solutions like lemon slices or a small bowl of coffee grounds to keep your fridge fresh.

    Step 8: Monitor the Temperature

    Maintain your fridge at an ideal temperature of 35°F to 38°F (1.6°C to 3.3°C). This range keeps food fresh while slowing bacteria growth. If your fridge lacks a built-in thermometer, consider purchasing one to ensure accurate readings.

  • Here are some top tips to make your BBQ a success:

    Here are some top tips to make your BBQ a success:

    A well-executed BBQ can be the highlight of any gathering, bringing friends and family together over delicious, smoky flavours. Whether you’re a seasoned grill master or hosting your first BBQ, planning and preparation are key to success. Follow these expert tips to create a memorable BBQ experience that’s sure to impress.

    1.Prep Ahead for a Stress-Free BBQ

    Preparation is the secret to a seamless BBQ. By handling some tasks in advance, you can focus on grilling and enjoying the day.

    • Marinate Early: Marinate your meats the night before to infuse them with maximum flavour. This saves time and ensures the seasoning penetrates deeply.
    • Chop & Prep Veggies: Slice vegetables, fruits, and other sides in advance. This allows you to concentrate on grilling without last-minute scrambling.

    2.Choose the Right Grill for Your BBQ

    Selecting the right grill and ensuring it’s in top condition is vital for a successful BBQ.

    • Charcoal vs. Gas: Charcoal grills provide that classic smoky flavour but require more time to heat up, while gas grills are quicker and offer precise temperature control. Choose the one that suits your style.
    • Check Your Equipment: Ensure your grill is clean and ready to go. Stock up on fuel—whether it’s charcoal or propane—so you’re not caught short mid-session.

    3.Master Temperature Control

    Temperature control is the foundation of great grilling. Proper heat management ensures evenly cooked, flavourful BBQ dishes.

    • Two-Zone Cooking: Set up a hot zone for searing and a cooler zone for slower cooking. This technique is especially useful for thicker cuts of meat.
    • Use a Thermometer: A good meat thermometer is essential for perfectly cooked food. It guarantees both safety and excellent taste.

    4.Prioritise Food Safety at Your BBQ

    Food safety is critical when handling raw meat and grilling. Follow these steps to keep everything safe and hygienic.

    • Avoid Cross-Contamination: Use separate cutting boards and utensils for raw and cooked foods. Keep raw meat chilled until you’re ready to grill.
    • Clean Hands & Tools: Wash your hands regularly and clean your grilling tools before and after use.

    5.Add Extra Flavour to Your BBQ

    Elevate your BBQ dishes with bold flavours and creative additions.

    • Wood Chips: Add soaked wood chips to your grill for a smoky twist. Try applewood, hickory, or mesquite for unique aromas and tastes.
    • Herb Butter & Glazes: Enhance meats and veggies with herb butter or a homemade glaze applied during the last few minutes of grilling.

    6.Avoid Overcrowding the Grill

    Spacing is key to even cooking and achieving the perfect char on your BBQ dishes.

    • Space Matters: Overcrowding can lead to uneven heat distribution and undercooked food. Arrange items with enough space for proper airflow.

    7.Keep the Flame Under Control

    Managing flames ensures your BBQ food is perfectly cooked rather than burned.

    • Avoid Flare-Ups: Flare-ups can ruin food. Keep a spray bottle of water handy to control flames or move food to the cooler side of the grill when needed.

    8.Let Your Meat Rest

    Resting meat after grilling is a simple yet crucial step for flavourful, juicy BBQ dishes.

    • Let It Rest: Allow meats to rest for a few minutes before slicing. This helps retain juices and enhances taste and texture.

    9.Get Creative with Sides

    A great BBQ isn’t just about the main course—delicious sides complete the meal.

    • Grill Your Sides: Add variety with grilled corn, asparagus, or even peaches for dessert. Grilling bread can also bring a smoky, crispy element to your spread.
    • Sauce Selection: Offer a range of sauces and condiments so guests can customise their plates. Homemade salsas, chimichurri, or aioli add a gourmet touch.

    10.Create a Comfortable BBQ Atmosphere

    Set the scene for your BBQ with thoughtful touches that make your guests feel welcome.

    • Seating & Shade: Ensure there’s enough seating and shaded areas for comfort. For evening BBQs, string lights can create a cosy, inviting ambiance.
    • Music Playlist: Play upbeat tunes to elevate the mood and keep the energy lively throughout your gathering.

    Conclusion

    By following these tips, you can host a BBQ that’s not only delicious but also stress-free and enjoyable for everyone. From prepping ahead and mastering temperature control to adding bold flavours and creating a welcoming atmosphere, your BBQ will be the talk of the summer. Fire up the grill, embrace the smoky goodness, and enjoy making memories with friends and family.

  • Oven Symbols: A Comprehensive Guide

    Oven Symbols: A Comprehensive Guide

    Fan Oven Symbols

    What it means:
    This symbol indicates that both the fan and heating element are in operation. The fan circulates hot air evenly throughout the oven, ensuring consistent cooking on multiple shelves.

    When to use it:

    • Roasting vegetables or meats
    • Baking cookies, cakes, or pastries on more than one shelf

    Conventional Heating (Top and Bottom Heat)

    What it means:
    Heat is generated from both the top and bottom of the oven. This traditional method provides steady, even heat.

    When to use it:

    • Baking bread, cakes, or pastries
    • Cooking casseroles or gratins

    Grill Symbol

    What it means:
    The top heating element is activated, similar to a broiler. This setting delivers intense heat from above.

    When to use it:

    • Grilling meat, fish, or vegetables
    • Toasting bread or cheese

    Fan with Grill

    What it means:
    The grill and fan work together, circulating hot air while grilling from above. This ensures thorough cooking for larger or thicker cuts of meat.

    When to use it:

    • Grilling chicken, lamb, or pork chops
    • Cooking larger fish fillets

    Bottom Heating Symbol

    What it means:
    Only the bottom heating element is activated, directing heat upwards.

    When to use it:

    • Baking pizzas, quiches, or tarts for a crispy base
    • Reheating pies or casseroles

    Defrost Symbol

    What it means:
    The fan circulates air at room temperature to gently defrost frozen food.

    When to use it:

    • Defrosting meat, fish, bread, or cakes
    • Avoiding the microwave for delicate items

    Fan with Top and Bottom Heat

    What it means:
    Combining traditional top and bottom heat with the fan ensures even heat distribution throughout the oven.

    When to use it:

    • Roasting meats evenly
    • Baking multiple trays of cookies or biscuits

    Pizza Setting

    What it means:
    The fan and bottom heating element work together, creating a crispy base while ensuring the top is cooked through.

    When to use it:

    • Baking pizzas or flatbreads
    • Cooking focaccia or savoury pies

    Keep Warm Symbol

    What it means:
    The oven maintains a low, consistent temperature to keep food warm without overcooking.

    When to use it:

    • Holding dishes until serving time
    • Keeping leftovers warm for second servings

    Pyrolytic Cleaning Symbol

    What it means:
    The oven locks itself and heats to an extremely high temperature, burning off food residue. This process turns grime into ash, which can be wiped away easily.

    When to use it:

    • Cleaning after heavy use
    • Maintaining a hygienic cooking environment

    Steam Cooking Symbol

    What it means:
    This setting uses steam to cook food gently, retaining moisture and nutrients.

    When to use it:

    • Steaming vegetables or fish
    • Baking soft, moist bread

    Light Symbol

    What it means:
    This symbol turns on the oven light without generating heat, allowing you to check on your food without opening the door.

    When to use it:

    • Monitoring cooking progress
    • Reducing heat loss by keeping the oven door closed
  • How to Maintain Your Washing Machine for Longevity and Efficiency

    How to Maintain Your Washing Machine for Longevity and Efficiency

    Your washing machine is one of the hardest-working appliances in your home. From tackling tough stains to keeping your clothes fresh, it’s a modern necessity. However, regular maintenance is essential to keep it running efficiently and extend its lifespan. Without proper care, you risk breakdowns, costly repairs, or even the need for a replacement. In this guide, we’ll explore the best ways to maintain your washing machine, so it serves you well for years to come.

    Clean the Drum Regularly

    Detergent residue, fabric softener, and dirt can accumulate in your washing machine’s drum, leading to unpleasant odours and reduced efficiency.

    • Run a Maintenance Wash: Many machines have a built-in maintenance wash cycle. Use it monthly to cleanse the drum thoroughly.
    • Hot Water Cycle: If your machine doesn’t have a maintenance cycle, run an empty cycle with hot water and add a cup of white vinegar or baking soda to break down residue and eliminate smells.
    • Wipe the Drum: After each use, dry the inside of the drum with a clean cloth to prevent mould and mildew.

    Keep the Door Open

    Leaving the washing machine door slightly ajar after each cycle allows air to circulate, helping to dry the interior. This step is particularly important if your washing machine is in a humid environment, as it reduces the risk of mould growth.

    Clean the Detergent Dispenser and Filters

    Soap residue and debris can clog the detergent dispenser and filters, impacting your washing machine’s performance.

    • Detergent Dispenser: Remove it and soak in warm, soapy water. Use a toothbrush to scrub away buildup and rinse thoroughly. For mould, spray with a bleach solution and rinse well.
    • Filter: Regularly check your filter for lint, loose change, or small objects that may obstruct drainage. Clean it to ensure efficient water flow.

    Inspect and Clean the Rubber Seal

    The rubber seal around the door of a front-loading washing machine can trap water and dirt, creating a breeding ground for mould and mildew.

    • Wipe After Every Wash: Clean the seal with a dry cloth to remove moisture and debris.
    • Deep Clean Periodically: Use a mix of water and white vinegar or mild detergent to clean the seal every few months. Dry thoroughly to prevent mould growth.

    Check the Hoses

    Water hoses can wear out over time, potentially causing leaks or bursts.

    • Inspect Regularly: Look for cracks, bulges, or leaks. Replace damaged hoses immediately.
    • Replace Every 3–5 Years: Even if hoses appear fine, replacing them every few years is a good preventive measure.

    Avoid Overloading

    Overloading puts unnecessary strain on your washing machine and can lead to unbalanced cycles or poorly washed clothes.

    • Follow Manufacturer Guidelines: Check your machine’s manual for the recommended load capacity.
    • Distribute Evenly: Balance the weight of your laundry around the drum to prevent unbalanced loads.

    Use the Right Detergent

    Using excessive detergent or the wrong type can cause suds, residue buildup, and potential damage.

    • Follow Dosing Instructions: Measure the correct amount of detergent based on load size and water hardness.
    • Choose the Right Type: If you have a high-efficiency (HE) washing machine, use HE detergent to prevent excessive suds and residue.

    Schedule Professional Maintenance

    While regular at-home care is essential, professional servicing can help identify and fix potential issues before they escalate.

    • Routine Inspections: Every couple of years, have a technician inspect your washing machine to ensure all components are in good working order.
    • Preventive Repairs: Address small problems before they turn into costly repairs or replacements.

    Why It’s Important to Maintain Your Washing Machine

    Regular maintenance helps:

    • Extend Lifespan: Proper care reduces wear and tear, making your machine last longer.
    • Improve Performance: A well-maintained washing machine cleans clothes more effectively.
    • Save Money: Preventing breakdowns reduces the need for costly repairs or replacements.

    Regular cleaning, checking components, and avoiding common mistakes like overloading can save you time, money, and hassle in the long run. 

  • Understanding Laundry Symbols

    Understanding Laundry Symbols

    Laundry symbols are those small icons on care labels that guide you on how to wash, dry, and iron your garments. While they might seem confusing at first, learning to interpret these symbols is essential for keeping your clothes in great condition and avoiding costly mistakes. This guide will simplify the most common laundry symbols, so you can care for your wardrobe with confidence.


    What Are Laundry Symbols?

    Laundry symbols are visual instructions on fabric care labels that provide guidance on:

    • Washing temperature
    • Drying methods
    • Bleaching suitability
    • Ironing settings
    • Professional cleaning requirements

    By following these symbols, you can prevent shrinking, fading, or damaging your clothes, helping them last longer.


    Common Washing Symbols

    Machine Wash

    • Bucket Icon: Indicates machine washing is allowed.
    • Numbers Inside: Specify the maximum washing temperature in degrees Celsius:
      • 30°C: Gentle wash for delicates.
      • 40°C: Everyday wash for most fabrics.
      • 60°C or Higher: For heavily soiled items like towels or bedding.

    Hand Wash

    • Hand in Bucket Icon: Means the item should be hand-washed in cold or lukewarm water.

    Do Not Wash

    • Crossed-Out Bucket: Indicates the fabric should not be washed. These items may need dry cleaning instead.

    Drying Symbols

    Tumble Dry

    • Square with a Circle Inside: Tumble drying is allowed.
    • Dots Inside the Circle: Indicate heat levels:
      • 1 Dot: Low heat, suitable for delicates.
      • 2 Dots: Medium heat for synthetic fabrics.
      • 3 Dots: High heat for durable items like towels.

    Do Not Tumble Dry

    • Crossed-Out Circle in a Square: Avoid using a tumble dryer. Opt for air drying instead.

    Line Dry

    • Square with a Line at the Top: Hang the item on a line to dry.

    Flat Dry

    • Square with a Horizontal Line in the Middle: Lay the garment flat to dry, ideal for knits and delicates that may stretch.

    Ironing Symbols

    Iron Allowed

    • Iron Icon: Safe to iron.
    • Dots Inside: Indicate the temperature setting:
      • 1 Dot: Low heat for delicates like silk.
      • 2 Dots: Medium heat for polyester and synthetics.
      • 3 Dots: High heat for cotton and linen.

    Do Not Iron

    • Crossed-Out Iron: Avoid ironing the fabric.

    Steam Ironing

    • Lines Under the Iron: Indicate if steam can be used. A crossed-out steam symbol means to avoid steam.

    Bleaching Symbols
    Bleach Allowed

    • Triangle Icon: Bleach can be used.

    Non-Chlorine Bleach Only

    • Triangle with Diagonal Lines: Use only non-chlorine bleach.

    Do Not Bleach

    • Crossed-Out Triangle: Avoid using any bleach.

    Dry Cleaning Symbols

    Dry Clean

    • Circle Icon: Dry cleaning is recommended. Letters inside the circle indicate instructions for professional cleaners.

    Do Not Dry Clean

    • Crossed-Out Circle: Do not dry clean the fabric.

    Why Understanding Laundry Symbols Matters

    Knowing how to interpret laundry symbols is about more than just following instructions. It helps:

    • Protect Fabrics: Prevent shrinking, fading, and wear.
    • Extend Lifespan: Keep clothes looking newer for longer.
    • Save Money: Reduce the need for replacements or repairs.

    Top Tips for Following Laundry Symbols

    1. Check Labels Before Buying: Ensure you’re ready for any special care requirements.
    2. Sort Laundry by Care Needs: Group items with similar washing and drying instructions to simplify the process.
    3. Invest in Laundry Tools: Use mesh bags, fabric-friendly detergents, and colour catchers for better results.
    4. Keep a Cheat Sheet: Print a guide to laundry symbols and keep it handy in your laundry area.

    Conclusion

    Laundry symbols may seem tricky at first, but once you understand them, they’re simple to follow. Proper care helps maintain the shape, colour, and texture of your clothes, ensuring they stay in great condition.

    Next time you encounter a label full of icons, you’ll know exactly what to do. By mastering laundry symbols, you’ll protect your wardrobe and enjoy a more efficient laundry routine.

    Keep your clothes looking their best – they’ll thank you for it!

  • How to Keep Your Oven Functioning Well

    How to Keep Your Oven Functioning Well

    Your oven is one of the most essential appliances in your kitchen and keeping it in good working order is key to ensuring it lasts for years and performs at its best. Regular maintenance can help prevent costly repairs, improve energy efficiency, and make your cooking experiences more enjoyable. Here’s a guide on how to keep your oven functioning well.

    1.Regular Cleaning is Crucial to keep your oven functioning well!

    • Wipe Spills Immediately: Whenever food or liquids spill inside the oven, clean them up as soon as the oven cools down. This prevents burnt-on residue that can be difficult to remove later.
    • Deep Clean Periodically: Perform a deep cleaning at least once every few months. You can use a mixture of baking soda and water to create a paste, apply it to the interior, let it sit, and then scrub it off. For tougher stains, consider using a commercial oven cleaner.
    • Clean the Racks Separately: Oven racks can be removed and cleaned separately. Soak them in warm soapy water, scrub with a non-abrasive brush, and rinse thoroughly before placing them back in the oven.

    2.Check and Replace Seals

    • Inspect Door Gaskets: The rubber or silicone seals around the oven door play a crucial role in maintaining the temperature inside the oven. Worn or damaged gaskets can lead to heat loss, resulting in longer cooking times and increased energy consumption.
    • Replace When Necessary: If you notice that your oven door isn’t closing properly or if the gaskets look cracked or worn, it’s time to replace them. This is usually a simple and inexpensive fix that can significantly improve your oven’s efficiency.

    3.Monitor and Maintain Heating Elements

    • Inspect Heating Elements: Regularly check the condition of your oven’s heating elements (both the bake and broil elements). Look for signs of wear, such as uneven heating, visible damage, or discoloration.
    • Replace Faulty Elements: If you notice any issues, replace the heating elements promptly. Faulty elements can lead to uneven cooking, longer preheat times, and reduced energy efficiency.

    4.Ensure Proper Ventilation

    • Keep Vents Clear: Your oven’s vents allow heat and smoke to escape during cooking. Make sure these vents are not blocked by dishes, food, or grease buildup.
    • Clean the Exhaust Fans: If your oven has an exhaust fan, clean it regularly to prevent grease and dust from accumulating. This will ensure proper airflow and reduce the risk of overheating.

    5.Use the Self-Cleaning Feature Wisely

    Self-cleaning ovens are a godsend – a feature we recommend using – just be careful not to overuse this function!

    • Understand When to Use It: The self-cleaning function can be convenient, but it’s important to use it wisely. This feature heats the oven to extremely high temperatures to burn off food residue, which can be taxing on the appliance.
    • Don’t Overuse: Limit the use of the self-cleaning function to when it’s truly necessary. Frequent use can strain your oven’s components and may lead to premature wear and tear.

    6.Handle Oven Doors with Care

    • Avoid Slamming the Door: The oven door is more delicate than it seems. Slamming it can damage the door’s hinges, seals, and even the glass.
    • Check for Alignment: Over time, the door may become misaligned, leading to heat loss. If you notice the door isn’t closing properly, check the hinges and adjust them as needed.

    7.Schedule Professional Maintenance

    • Annual Inspections: Consider having a professional inspect your oven annually. They can identify and fix potential issues before they become serious problems.
    • Address Repairs Quickly: If you notice any unusual noises, smells, or performance issues, don’t delay in calling a professional. Timely repairs can prevent minor issues from turning into costly repairs or replacements.

    Conclusion

    By following these tips, you can keep your oven functioning well for years to come. Regular cleaning, careful use, and timely maintenance not only extend the life of your oven but also ensure it operates efficiently, saving you time, energy, and money. A well-maintained oven is a reliable kitchen companion that makes every cooking experience a success.

  • Why Autumn Is the Perfect Time to Dust Off the Slow Cooker

    Why Autumn Is the Perfect Time to Dust Off the Slow Cooker

    Slow Cooker – We can’t live without ours!

    As the kids head back to school and the afternoons start to feel a bit more hectic, there’s nothing nicer than knowing a hot meal will be ready as soon as they get through the door.

    With autumn fast approaching, we naturally begin to think about stews, casseroles and all those comforting dishes that make the darker evenings a little brighter, which is where the trusty slow cooker really comes into its own.

    Pop it on and forget about it

    The beauty of a slow cooker is the ease. A quick bit of chopping in the morning, a handful of ingredients in the pot, and you can leave it to get on with the job while you tackle the rest of your day. By the time coats and school bags are being dumped in the hallway, the house smells wonderful, and supper is ready with almost no effort at all.

    Cosy food for cooler days

    Autumn calls for warming, filling meals – beef stew, chicken casserole, a hearty vegetable curry. These sorts of dishes taste even better when cooked gently over hours, with flavours deepening and textures melting into one another. It’s the kind of food that feels like a hug in a bowl.

    Kind to the purse strings

    Slow cookers aren’t just convenient, they’re economical too. Cuts of meat that might usually be tough turn tender and delicious after a long, slow cook, and you can easily bulk meals out with beans, lentils and seasonal veg. It’s proper family cooking that doesn’t cost the earth.

    Healthier, fuss-free meals

    Because everything cooks slowly and gently, you don’t need lots of oil or fancy extras. Soups, stews and sauces develop their flavour naturally, leaving you with wholesome, hearty meals that don’t feel overly heavy.

    Perfect for planning ahead

    If you like to cook in batches, the slow cooker is your best friend. A big pot of chilli or casserole can be portioned out for the freezer, making those busy weeknights so much easier. Leftovers also tend to taste even better the next day.

    With the season changing and comfort food calling, it’s the perfect time to dust off your slow cooker and put it back to work. Whether you’re cooking for one, feeding the whole family, or just looking for a way to make evenings less stressful, it’s a kitchen gadget well worth having on the go.